
All directions on this page are copyright to Sarah Shiel, and the carrier pattern is copyright to Corinna Troth. Please do not use these directions, or close variations thereof, to make carriers for profit, without permission from Corinna.
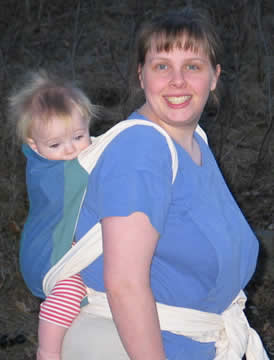
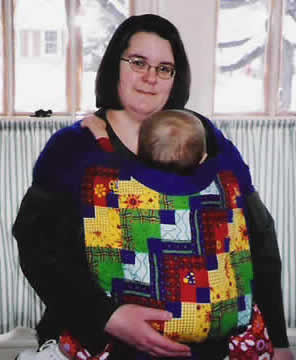
My friend, Corinna, on the yahoo slingsewing group had this ingenious idea for an Asian style baby carrier with modified straps that mimic a wraparound baby carrier. She called it a FrankenKozy, since she was inspired by Kelley's Kozy Carrier.
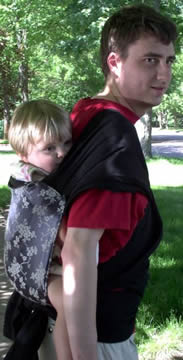
I loved the idea immediately and have sewn several. This baby sling works wonderfully worn on your front or back, and spreads the distribution of weight over both shoulders to make it more comfortable. If you are interested in chatting about sewing slings and other baby carriers, check out this yahoo group: slingsewing-subscribe@yahoogroups.com.
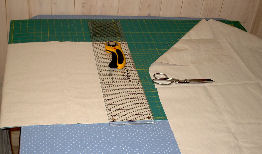
1. Cut out straps and main body piece. I do this by folding the fabric in half lengthwise so it's roughly 30" wide by 2 1/3 yds long (75x214cm). Cut in half, lengthwise through both layers, to give you two 15" wide, really long shoulder straps that have one edge from the selvedge. (38cm wide) I make the width of the straps anywhere between 12 to 15 inches (30 to 38 cm), depending on the width of my fabric. I make my shoulder straps about 66" (168cm)long and my waist straps about 41" (104cm).I am a large woman, though, so most people could probably get by with much shorter straps, 23 - 30" (58 - 76cm) for the waist and 58 - 64" (147 - 162cm) for the shoulders. |
 |
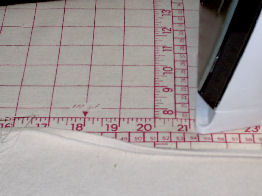
2. Now cut on the fold line down the length to your desired waist strap length (41" or shorter) (104cm). You will have a rectangle of fabric leftover, which works well for one piece of the body, ra ther conveniently! |
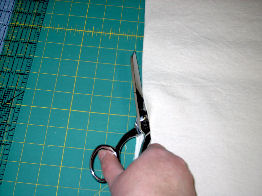 |
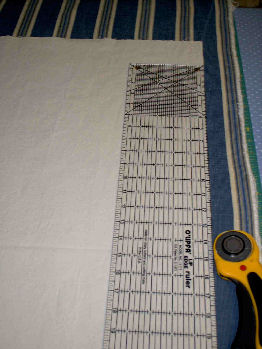
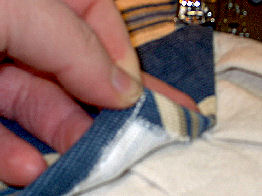
3. I have just cut on the fold to my desired waist strap length, then used my rotary cutter to cut off the excess ( the waist straps are much shorter than the shoulder straps). This excess is unfolded under my scissors in this photo and will be used for the inner body piece. |
 |
4. Press and hem the straps, leaving a raw edge at one of the short ends. I fold and press under 1/4th inch (0.5 cm), then fold and press 3/8 inch (1 cm) for my hem. |
 |
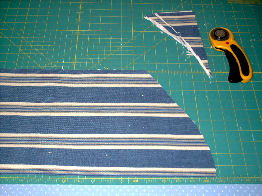
5. Cut out body pieces (2 or 3, depending on your fabric) 19" wide by 24" tall (48cm wide x 61cm tall). I make the inner body of the same fabric as the straps and use a fashion fabric for the outer (blue and cream striped in this photo). If my fashion fabric is not very stable (like silk), I will also use a third body piece that will be hidden inside, cut out of canvas or sportswear, to add stability. |
 |
6. (Optional) Make an arch at the top of the body. Fold the body pieces in half lengthwise, then cut an arch or smile just as you would to make a pouch. the top of the arch is about 4-5 inches (10-12.5 cm) taller than the bottom of the arch. If you twist your head a bit, does it look like a smile folded in half? |
 |
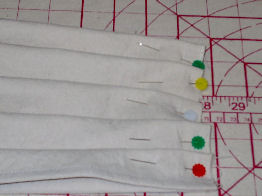
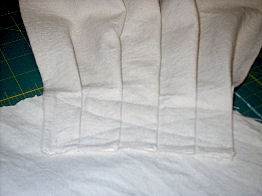
7. Make pleats at the raw edge of all four straps. I make my pleats about 1 inch (2.5cm) in size, but you can make them however you like. You could see a line of stitching across the pleats, about an inch in from the raw edge, if you like. This is one extra step that's not really necessary, but it means you don't have as many pins to contend with when you sew the straps to the body. |
 |
8. Attach straps to the inner body (or hidden body piece if you are using 3 body pieces), wrong sides together. Position each strap at a 45 degree angle right at each corner and sew in place, making an X to add reinforcement. To ensure that you don't lose your arch on the top of the carrier, be certain to place the straps right on the corner of where the straight edge of the body meets the start of the arch. It's easy to mistakenly pin the straps right on the arch, but then they will be too close together and you won't be able to fold the arch down once it's finished. Also, make sure you have at least two inches of your strap attached to the body piece. |
 |
9. A close-up view of the X reinforcement, the strap sewn on to the inner body piece. Assuming you are using a 1/4 inch (0.5 cm) seam allowance, you really should leave at least 1/2 inch (1 cm) (or double whatever seam allowance you use) between any stitching and the raw edge. I did NOT do this in this photo, and I had to pick out some stitching later. The seam allowance must be folded under while topstitching, as in step 11, so you must leave space for it! |
 |
10. Stack and pin all body pieces together, making sure you have the right side of your outer fashion fabric facing the right side of your inner fabric. (If using a third body piece, it doesn't matter if you have the hidden piece on top or bottom of the stack. When you turn it right side out, the hidden piece will be hidden inside). Stitch all around the body leaving openings for where the straps come out. Turn it right side out through a strap opening and press. |
 |
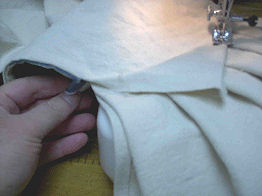
11. Close all of the strap openings with topstitching, folding the seam allowance under. Position your carrier with the outer side down, so you can topstitch on the inner first. Underneath, you need to pull the fashion fabric at the openings away from the body, so as you topstitch on the inner body, your stitching won't catch any of the outer body. |
 |
12. Once you topstitch each of the 4 openings closed from the inner side, flip the carrier over and topstitch around the entire body. This will close the four strap openings that still remain open on the outer body. (This seems ra ther tedious, I know, but it is much easier than trying to catch both seam allowances on each side with just one line of topstitching.) |
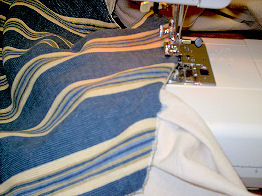 |
13. A close-up view of folding the seam allowance under, topstitching on the outer fabric to close the strap openings. |
 |
Viola! |
 |
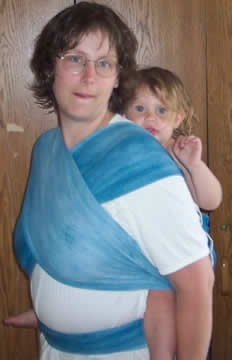
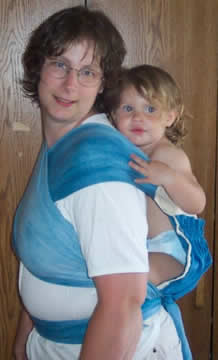
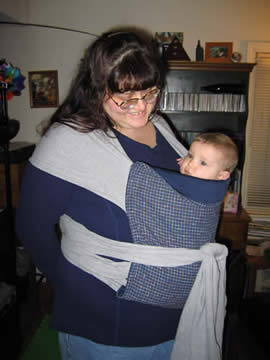
Gallery of carriers sewn by other moms: