 A different diaper bag A different diaper bag
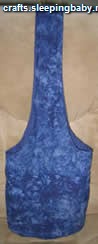
 By request! This has an actual pattern and such, but it's simple -- three pieces. It's reversible, which makes it a great showcase for some of the gorgeous quilting calicos out there. I'd suggest a pretty pattern on one side, and a coordinating solid on the other, or two coordinating prints; I understand that stripes and weird florals are quite in vogue right now :)
This ought to hold a fair amount of stuff; it has four pockets (two inside and two outside, since it's reversible), and will work fine with a sling.
This pattern is copyright to me (Jan Andrea) and is NOT for resale under ANY circumstances!
 |
 |
 |
| Handle/top | Pockets | Base |
there is a light grey grid behind each piece; the grid lines should be at 1" square when printed. If they do not print correctly, you can use them to make your own patterns.
|
Also cut two pocket pieces from the lining. |
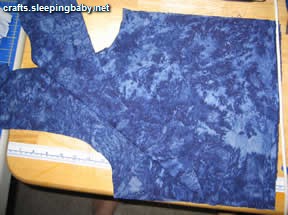
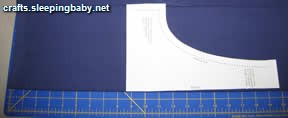
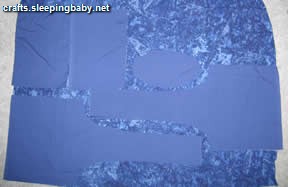 3. To cut the pieces for the print, I used the pieces I'd cut in steps 1
and 2 as pattern pieces. The print is only 45" wide, so I had to lay the pieces
out differently. This layout is pretty close to being as efficient as it can;
I think the pocket pieces could be arranged differently, though. 3. To cut the pieces for the print, I used the pieces I'd cut in steps 1
and 2 as pattern pieces. The print is only 45" wide, so I had to lay the pieces
out differently. This layout is pretty close to being as efficient as it can;
I think the pocket pieces could be arranged differently, though. |
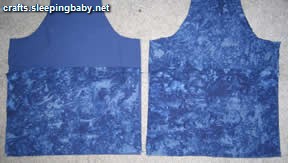
 4. Sew one lining pocket piece to one print piece, right sides together,
just on one long edge; turn and topstitch along that edge. You may baste the
other sides if you want to, but that's not necessary. Repeat with the other two
pieces. 4. Sew one lining pocket piece to one print piece, right sides together,
just on one long edge; turn and topstitch along that edge. You may baste the
other sides if you want to, but that's not necessary. Repeat with the other two
pieces. |
 5.
Pin the pockets to the right sides of one each lining and print pieces, matching
long and short sides and raw edges ( the topstitched edge should be at the top
of the bag). You can match the fabrics as you see fit; I like the print, so I
put the pocket print-side-out on both the lining and the outside. You can also
contrast or match them, as you like. 5.
Pin the pockets to the right sides of one each lining and print pieces, matching
long and short sides and raw edges ( the topstitched edge should be at the top
of the bag). You can match the fabrics as you see fit; I like the print, so I
put the pocket print-side-out on both the lining and the outside. You can also
contrast or match them, as you like. |
You can also divide it into 3 pockets instead of two, if that seems like it will be more useful; or make a narrow pocket in addition for writing utensils. |
 7.
Pin bag pieces right sides together, lining with lining and print with print.
Sew along the short sides, being sure to catch all the layers (pocket and bag
pieces). 7.
Pin bag pieces right sides together, lining with lining and print with print.
Sew along the short sides, being sure to catch all the layers (pocket and bag
pieces). |
 8.
Baste two bottom pieces (i.e. One fashion fabric and one scrap or lining; then
one lining and one scrap or lining, so that you've got two 2-layer bottom pieces
when you're done) together, being sure to stay a consistent 1/2"
from the edge. This basting will be your guide in the next step, so sew slowly
and carefully. Repeat with the other two bottom pieces. These pieces will be
treated as a single unit in the following step. 8.
Baste two bottom pieces (i.e. One fashion fabric and one scrap or lining; then
one lining and one scrap or lining, so that you've got two 2-layer bottom pieces
when you're done) together, being sure to stay a consistent 1/2"
from the edge. This basting will be your guide in the next step, so sew slowly
and carefully. Repeat with the other two bottom pieces. These pieces will be
treated as a single unit in the following step. |
Pin one bottom to one bag part, right sides together, and taking care to make all the divisions equal. |
Repeat steps 9-10 on remaining bag and bottom pieces. |
 11. The finished seam on the print fabric, right side out: 11. The finished seam on the print fabric, right side out: |
Sew one edge of the bags together -- from strap to curve back up the next strap -- leaving the short edges of the straps free. |
Turn the bag right-side out through the space. It will look really weird until you push one bag into the other, now with wrong sides together. |
 14. The bag, turned right-side out, before the strap portions are sewn together: 14. The bag, turned right-side out, before the strap portions are sewn together: |
 15. If you've ever made a lined vest, you'll be familiar with this technique.
If you haven't... well, when you're done with this, you'll be able to make one!
Pin the strap pieces together, matching the lining and print sides. 15. If you've ever made a lined vest, you'll be familiar with this technique.
If you haven't... well, when you're done with this, you'll be able to make one!
Pin the strap pieces together, matching the lining and print sides. |
  16. Sew along the top, rearranging the fabric as necessary: 16. Sew along the top, rearranging the fabric as necessary: |
Doesn't look like much, does it? Ah well. |
Topstitch around the straps and curved portion, stitching the gaps closed at the top of the strap and where the bag was turned. |
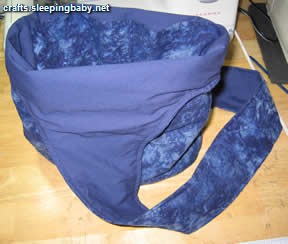 19.
the finished bag, showing the pockets inside and the topstitching, at left; and
the full bag, at right. 19.
the finished bag, showing the pockets inside and the topstitching, at left; and
the full bag, at right. |
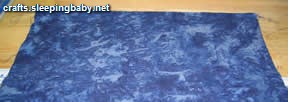
 1. Lay the pattern out on your lining fabric. I folded my
fabric twice to get the necessary two layers -- it's 7" wide by 30" long; unfolded,
28" wide, 30" long. You won't necessarily need that much length; I wanted a longer
strap, but you could go as low as 26" long, or 24" if you made the sack part
shallower.
1. Lay the pattern out on your lining fabric. I folded my
fabric twice to get the necessary two layers -- it's 7" wide by 30" long; unfolded,
28" wide, 30" long. You won't necessarily need that much length; I wanted a longer
strap, but you could go as low as 26" long, or 24" if you made the sack part
shallower. 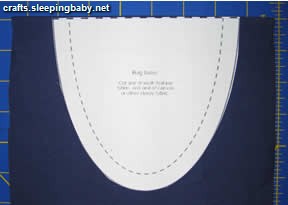 2. I cut this bottom piece from the fabric leftover from step one. You'll
need four bottom pieces, though; two from your fabrics, and another two either
from the lining fabric or some scrap fabric. This will stabilize the bottom of
the bag.
2. I cut this bottom piece from the fabric leftover from step one. You'll
need four bottom pieces, though; two from your fabrics, and another two either
from the lining fabric or some scrap fabric. This will stabilize the bottom of
the bag. 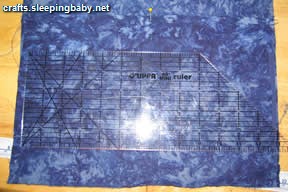 6. Mark the middle of the pocket piece (6.5" from either end) and pin in
place. Sew along that line. Use a strong stitch, and reinforce the stitching
at the top; it will be under stress as things are put in the pockets.
6. Mark the middle of the pocket piece (6.5" from either end) and pin in
place. Sew along that line. Use a strong stitch, and reinforce the stitching
at the top; it will be under stress as things are put in the pockets. 9. Find the center axis points on the bottom pieces -- just fold them in
half, vertically and then horizontally, using pins to mark those points. The
points of the narrower curves will match up with the seamlines on the bag pieces;
the wide ones will match up with the fold lines on the bag pieces.
9. Find the center axis points on the bottom pieces -- just fold them in
half, vertically and then horizontally, using pins to mark those points. The
points of the narrower curves will match up with the seamlines on the bag pieces;
the wide ones will match up with the fold lines on the bag pieces.  10. Sew one bottom part to one bag part, using your basting from step
8 as a guideline. This is tricky to sew, and will require patience; go slowly,
and if you make a huge mistake (like sewing closer or fur ther than 1/2" from
the edge), take out those stitches.
10. Sew one bottom part to one bag part, using your basting from step
8 as a guideline. This is tricky to sew, and will require patience; go slowly,
and if you make a huge mistake (like sewing closer or fur ther than 1/2" from
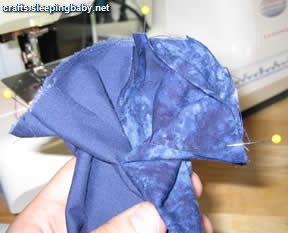
the edge), take out those stitches. 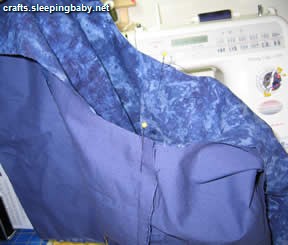 12.
Pin your print bag to the lining, right sides together, matching curves and ends
of straps. Basically, put one bag, right side out, inside the other one, right
side in. The pockets should be opposite each other ra ther than next to each other
-- i.e. in this photo, one is on the right and one on the left, so they don't
end up on the same side of the bag when it's turned right-side-out.
12.
Pin your print bag to the lining, right sides together, matching curves and ends
of straps. Basically, put one bag, right side out, inside the other one, right
side in. The pockets should be opposite each other ra ther than next to each other
-- i.e. in this photo, one is on the right and one on the left, so they don't
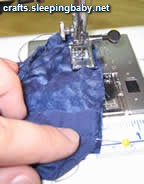
end up on the same side of the bag when it's turned right-side-out.  13. For the other side, start and end your stitching about 2" from the short
ends of the straps. Also leave a 4" space close to the curve, but not on it,
for turning.
13. For the other side, start and end your stitching about 2" from the short
ends of the straps. Also leave a 4" space close to the curve, but not on it,
for turning.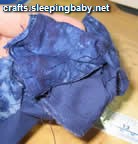 17. The strap shown after sewing but before the seam is pulled closed:
 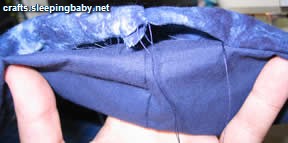 18. If you tug on the strap fur ther down from the new seam, it will collapse
into the strap.
18. If you tug on the strap fur ther down from the new seam, it will collapse
into the strap.